Surveillance technology has become a household necessity in an age where security is paramount. Picture this: you come home after a long day to find that your front porch is now under the watchful eye of a sleek and reliable Lorex LNB9252B Bullet Camera.
Setting up such high-tech equipment might seem daunting, but fear not! This complete guide will demystify the process and empower even the most novice tech users to take control of their home security confidently.
Introduction
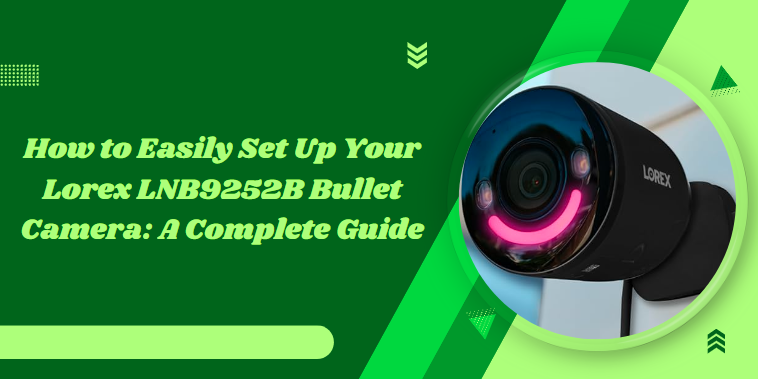
The Lorex LNB9252B Bullet Camera is a standout choice for anyone seeking an effective security solution that combines durability with high-tech features. It’s robust housing, built to withstand various weather conditions, ensures reliable surveillance year-round.
The impressive 4MP resolution captures crisp images, allowing users to monitor their properties in remarkable detail day or night—thanks to its advanced infrared night vision capabilities.
Unboxing Your Lorex LNB9252B Bullet Camera
When unboxing your Lorex LNB9252B Bullet Camera, it’s essential to check the contents carefully to ensure everything is included and in good condition for a smooth installation process. Here are the essential steps to follow when unboxing your Camera.
What’s Included in the Box?
The package should contain the following items:
- Lorex LNB9252B Bullet Camera
- Mounting Kit (screws, anchors)
- Ethernet Cable for network connection
- Quick Start Guide for installation instructions
Camera Components and Accessories
The Camera itself comes with sturdy weatherproof housing, and the mounting kit includes all necessary screws, anchors, and tools needed for installation. The included Ethernet cable will be vital for connecting your Camera to the network.
Checking for Missing Items Before Installation
Before installing, ensure all components are present and in working condition. If any item is missing, contact the supplier for replacements before beginning setup.
Pre-Installation Checklist
Before installing your security camera, it’s crucial to ensure you have the right tools and equipment and select the best location for optimal performance. Here are the necessary steps to ensure your camera installation is efficient and effective:
Tools and Equipment You’ll Need for Setup
The correct tools will make the installation process smooth and efficient.
- Essential Tools for Installation
Drill, screwdriver, measuring tape, and a ladder.
Network tools like an Ethernet cable tester (if applicable).
- Recommended Mounting Hardware for Different Surfaces
For brick or concrete: use masonry anchors and screws.
For wood: regular screws should suffice, but ensure they’re long enough for a secure hold.
Choosing the Ideal Location for Your Camera
Selecting the best position is critical for capturing clear footage and maximizing coverage.
- Factors to Consider: Height, Angle, and Coverage Area
Mount the Camera at least 8-10 feet high to avoid tampering and ensure a wide viewing angle.
Consider obstructions, lighting, and blind spots that could affect the Camera’s effectiveness.
- Optimal Placement for Maximum Security and Visibility
Place cameras near entry points, such as doors, windows, and garages, to cover high-traffic areas.
How to Install Your Lorex LNB9252B Bullet Camera?
To install your Lorex LNB9252B Bullet Camera effectively, follow these key steps to ensure proper setup and functionality.
Mounting the Camera
- Mounting Brackets and Fixing the Camera to the Wall or Ceiling
Use the provided mounting brackets to secure the Camera to the desired surface. Drill holes and fasten the Camera using screws that fit the type of wall or ceiling you are working with.
- Ensuring Proper Alignment for the Best Field of View
Adjust the angle of the Camera to cover the intended area, keeping key entry points and blind spots in mind. Make sure the lens is aligned to maximize visibility without obstructions.
Running Cables for Power and Data
- Wiring Options: Power-over-Ethernet (PoE) Setup
Connect the Camera to an Ethernet cable that supplies power and data for a PoE setup. This reduces the need for extra wiring and simplifies installation.
- Concealing and Protecting Your Cables for a Clean Installation
Run cables through walls or use conduit to conceal and protect them from damage. This not only keeps your setup neat but also ensures the longevity of the wiring.
Connecting Your Lorex LNB9252B Bullet Camera to the Network
To get your Lorex LNB9252B Bullet Camera up and running, follow these steps to connect it to your network for seamless monitoring.
Connecting to Your Home or Business Network
When deciding between a wired or wireless setup, it’s essential to consider your environment. Wired connections, such as Power-over-Ethernet (PoE), offer stable and uninterrupted data transmission, making them ideal for high-security setups. You can connect your camera with a single Ethernet cable using PoE, which provides power and network access, simplifies installation, and reduces clutter.
Configuring Your Camera via the Lorex Home App
Begin by downloading the Lorex Home App from your device’s app store. Once installed, follow the step-by-step guide to add your Camera. Open the app, create an account, and select “Add Device.” Scan the QR code on your Camera or manually input its unique identifier. Once connected, you can manage settings, view live footage, and receive alerts through the app.
Setting Up Camera Features and Settings
To ensure your Lorex LNB9252B Bullet Camera works efficiently, it’s essential to configure its features and settings for optimal performance. Here are the main steps to help you fully set up and optimize your Lorex camera for maximum efficiency:
Adjusting the Camera’s Field of View
You can tilt, pan, and zoom your Camera for the best view. Adjust these settings to cover the desired area, ensuring you capture every critical angle. You can also set up specific motion detection zones to focus on high-traffic or vulnerable areas, optimizing security coverage.
Configuring Alerts and Notifications
Setting up motion detection alerts is simple. By accessing the camera’s alert settings, you can enable notifications for any activity in designated zones. Customizing the sensitivity levels will help you avoid false alerts and ensure you are notified only when necessary.
Optimizing Video Quality and Storage Settings
Adjusting the resolution is key to balancing video quality and performance. Opt for higher resolution settings for more apparent footage, but be mindful of storage space. Depending on your preference for video backup, you can choose between cloud storage or local storage.
Testing and Finalizing Your Lorex LNB9252B Bullet Camera Setup
After installing your Lorex LNB9252B Bullet Camera, testing and finalizing the setup is essential to ensure it operates efficiently. Here are the steps to ensure your Camera is fully set up and secure for reliable performance:
Testing the Camera’s Functionality
First, verify that your Camera’s video feed is clear and stable by checking the live stream. Ensure the network connection is consistent and that all features, such as motion detection, work properly. If issues arise during setup, such as lag or disconnects, refer to troubleshooting guides to resolve them quickly.
Securing Your Camera Against Tampering
For added protection, lock the camera settings to prevent unauthorized changes. This ensures the Camera maintains its configuration even if tampered with physically or remotely. Regular maintenance, such as cleaning the lens and checking the wiring, is recommended to keep your Lorex LNB9252B camera functioning optimally over time.
Troubleshooting Common Lorex LNB9252B Setup Issues
Setting up your Lorex LNB9252B Bullet Camera may occasionally present some challenges. Here’s how to address common setup issues effectively.
Fixing Network Connectivity Problems
If your Camera isn’t connecting to the internet, check your network settings and ensure that your Power-over-Ethernet (PoE) cables are securely plugged in. Restarting your router or modem may also resolve connectivity issues. If the problem persists, verify the Camera’s IP settings and reset it to factory defaults as a last resort.
Addressing Poor Video Quality
Poor video quality can often be resolved by adjusting the resolution settings in the Lorex Home app. Ensure your network has sufficient bandwidth for higher video resolutions and increase the frame rate if needed. Cleaning the camera lens can also improve clarity, especially in outdoor installations.
Dealing with Motion Detection Errors
If you’re experiencing too many false motion alerts, adjust the camera’s sensitivity levels. Narrow the motion detection zones to cover only critical areas and reduce alerts from unimportant movements like passing cars or tree branches.
Conclusion
In conclusion, setting up your Lorex LNB9252B Bullet Camera is straightforward and can greatly enhance the security of your home or business. By following the step-by-step instructions outlined in this guide, you can ensure that your Camera is configured correctly for optimal performance.
Remember to utilize the available features, such as motion detection and remote access, to fully utilize your Camera’s capabilities. Regular maintenance and updates will help keep your system running smoothly and effectively. Don’t wait any longer; start securing your space today by installing your Lorex camera!